Tuesday, October 11, 2016

Focal length of digiscope revisited


I wrote a blog post about attempting to calculate the focal length of my digiscoping setup some time ago (here) for the DSLR setup I described in this blog post. I came to the conclusion that, with the telescope's eyepiece on its minimum magnification of 20x, it was acting as about a 1,000mm F12 lens (and since the camera - a Canon 60D - has a 1.6 crop factor, the 35mm equivalent focal length would therefore be 1,600mm).

Back in February, I was preparing a talk on digiscoping for a local camera club and decided to tackle the same question a different way. I went to the Rothschild's Mere hide at Woodwalton Fen and spent a couple of hours taking pictures of the same subjects with various digiscoping setups and also with my Canon 300mm F4 prime lens which I could then use as a standard for comparison.

Here are some Cormorants sat on the tern raft in front of the hide taken using the Canon 60D with the 300mm F4 lens.
Scaled down image from full frame: 300mm, F8, 1/1000s, 400 ISO
100% crop showing the measurement I made from the beak tip to the back of the head on a line projected through the point of the yellow triangle on the face
Whilst viewing the image at 100%, I measured the width of the head of the adult Cormorant on the right, from the tip of the bill to the back of its head along a line projected through the point of the yellow triangle below its eye. This line was 263 pixels long in this case. 

To check that this worked reasonably well, I put my 1.4x converter on the lens and took, as near as possible the same shot (bearing in mind that this all takes time and birds move!).
Scaled down image from full frame: 300mm with 1.4x converter, F8, 1/1000s, 800 ISO
100% crop. Same measurement - 374 pixels
Note I had to bump the ISO up by a stop (from 400 to 800) to get the same exposure as you would expect. As near as possible the same measurement of the same bird (but of course there is some error because it may well have its head in a slightly different position) was now 374 pixels. 374/263 = 1.42, so pretty close to the 1.4x I would expect from the converter.

Here is a digiscoped picture of the same bird with my telescope's eyepiece on its minimum magnification of 20x.
Scaled down image from full frame: Digiscoped image, Kowa 823 with 20-60x eyepiece on minimum, Canon 60D with an Olympus 50mm F1.4 lens wide open at 1/320s, 800 ISO mounted on the eyepiece.

100% crop, Same measurement: 925 pixels
The whole head no longer fits in my 100% crop shown here, but the same measurement on the original image now comes out at 925 pixels. 925/263=3.509 suggesting the focal length equivalent of 1,053mm (300 x 3.509). This is pretty close to the 1,000mm I calculated in my previous blog post. Note also I have gone from an exposure of 1/1000s at F8 to 1/320s with the Olympus 50mm F1.4 wide open to maintain the same ISO setting.

With the telescope's eyepiece bumped up to its maximum magnification of 60x here is what I got.
Scaled down image from full frame: Digiscope at 60x, 1/60s, 800 ISO
100% crop, same measurement 3052 pixels
Now we can only get the eye in on a 100% crop, but the same measurement across the head comes out at 3052 pixels. 3052/263=11.583 suggesting a focal length of 3,375mm. The exposure had to go from 1/320s to 1/60s (which is probably one reason why it is not very sharp and shows signs of camera shake!) - another 2.5 stops. Given that this is a 1.6x crop factor camera, the 35mm focal length equivalent is a whopping 5,560mm!

Saturday, October 08, 2016

Phoneskoping

I have an HTC one-V smartphone which runs Android 4.0.3. It has a 5 Mp camera (1552 x 2592 pixels) - which is not of tremendously good quality! Nevertheless, since I usually carry it when I am out birding, the idea of simply being able to slip it on to the eyepiece of my telescope for a quick record shot, is quite attractive.

I came across Phoneskope adapters at the Bird Fair at Rutland Water some years ago. At the time, they made a universal adapter that attached to a 'phone cradle using self-adhesive Velcro (I am not sure whether they still do this model). I paid £28.80 for the version of the adapter made specifically for my telescope eyepiece (Kowa 20-60x zoom) and about another £3 for a hard shell case for my 'phone from eBay. The cost of the adapter seemed a bit high for a simple plastic cup with a hole in the bottom - but I can understand that tooling up to make these is probably quite expensive and there are a lot of different eyepiece models out there. So the market for each type of adapter to fit a particular model is probably quite restricted!
The phneskope adapter attaches to a hard shell case for the phone by a self-adhesive ring of Velcro.
The Phoneskope adapter came with a self-adhesive Velcro ring. It was straightforward to stick one half to the back of the adapter and the other half to the hard shell case, centred around the camera holes. The tricky part is getting the two parts attached together by the Velcro so that the camera is exactly centred over the eyepiece of the telescope. This required very precise positioning and took a lot of trial and error. Once I got the two halves together in the correct alignment however, the Velcro formed a pretty strong and robust join, so I haven't had to do it again. Here it is in place on the eyepiece of my telescope:
The photo shows the Android stock camera app. There is a zoom bar up the left hand side the shutter button is the blue circle at the lower-right. Use is very straightforward (assuming the telescope is focused on the subject before mounting the phone):
  1. You need to zoom in a bit to reduce the vignetting at the top and bottom corners by tapping the zoom bar,
  2. Tap on the image where you want the camera to focus (usually the bird's eye),
  3. Tap the shutter button to take the picture
This is easy and quick, but the downside is step 3 - tapping the shutter button. One of the biggest problems with digiscoping is camera shake, so the last thing you want to do is to tap the camera at the moment you take the photo! I found a free Android app called "Say cheese camera" which essentially adds voice activation for the camera. According to Google Play, it works with Android 2.2 and upwards and there is also an iPhone version available. As the name suggests, what this does is to trigger the camera when you say "cheese" - or any other distinct and isolated word (or even clap your hands - not a good move in a bird hide though). I find "Go!" or "take" work well and are less embarrassing when other people are nearby! The advantage, of course, is that you can trigger the camera without touching it.

I have to say that the results I get are not brilliant, but I think that is down to this particular phone model which has a pretty indifferent camera. The HTC one-V was launched in 2012 and clearly the technology has moved on. The current generation of phones have much better cameras and there are some pretty decent bird images to be found on Flickr, forums, etc. taken using mobile phones. There is certainly nothing wrong with the Phoneskope adapter. The whole this is quite robust, and small and light enough to be conveniently carried in my anorak pocket. It slips on easily and quite firmly and I can quickly grab a record shot with the minimum of fuss. These are good enough to convince my birding friends that I have actually seen what I say I've seen., which is the main point of the exercise for me.
Red-necked Grebe at Rutland Water

Thursday, October 06, 2016

Manfrotto 349 hide clamp

I am not sure exactly when I bought my hide clamp, but I think it was probably in the early 2000s. It is a Manfrotto 349 and is still available (for about £60 on Amazon - I think I paid £42 for mine, which indicates how long ago it was).
It is a pretty simple device: a tube which fits the centre column from my tripod forming the stem of a G-clamp which allows it to be firmly mounted on the edge of the shelf in a hide, or even on something like a fence rail or tree branch. The jaws of the clamp open up to about 60mm and the whole thing weighs 400g. Here it is in position, clamped to the shelf in a bird hide and supporting my telescope:

Of course, it can just as easily be used to support a camera with a long lens. What I like about this design is that it utilises the centre column and pan-tilt head from my tripod - which I am carrying anyway. Some other designs, like the Opticron Universal or the RSPB's hide clamp, effectively have their own centre column and head built in, so if you are carrying a tripod, you end up with two similar bits of kit and have to carry both!

I have found it to be very well made and robust. The cross bar on the screw which tightens the clamp is big enough so that you can clamp it pretty firmly and the centre column can be securely fastened over range of heights to cope with hides with the shelf at varying distances below the viewing window. Swapping the centre column between the tripod and the clamp is very easy and quick. I have only come across one hide where I couldn't get the clamp over the shelf and that is the Jordan Hide at Holkam - which has an edging strip attached to the shelf which is too wide for the jaws to fit over. However, somebody has thoughtfully cut notches in this strip, so there are just a few place where the clamp will fit. Frustrating if the hide is full and you can't get a seat in the right spot!

I find I use a hide clamp less often these days. Hide designs have moved on and it is not infrequent to find hides where you can use a telescope or camera standing up with your tripod fully extended. For example the Island Mere Hide at Minsmere or the Parrinder Hide at Titchwell are designed to allow this. Another design I like is the hides at the RSPB's Frampton Marsh reserve where the benches are not fixed down. This allows you to move the seat far enough away from the hide wall so that you can sit behind a partially extended tripod. Nevertheless, many more traditional hides have a fixed bench and a single, narrow window designed for those sitting on the bench. In these cases, the space between the bench and the shelf is too narrow to use a tripod (I really have tried!) and a hide clamp is the solution for me.

The only downside to a hide clamp (apart from remembering to take it) is that any vibration in the hide caused by people moving about and getting up and down is transmitted to your telescope or camera through the building's structure. Of course this happens to some extent however you use your optical gear, but it is exacerbated by having your equipment firmly clamped to the structure. This can get annoying when hides are busy, but I don't usually find it to be more than a momentary issue.

Wednesday, October 05, 2016

Carrying my tripod - strap and Cley Spy Mulepack

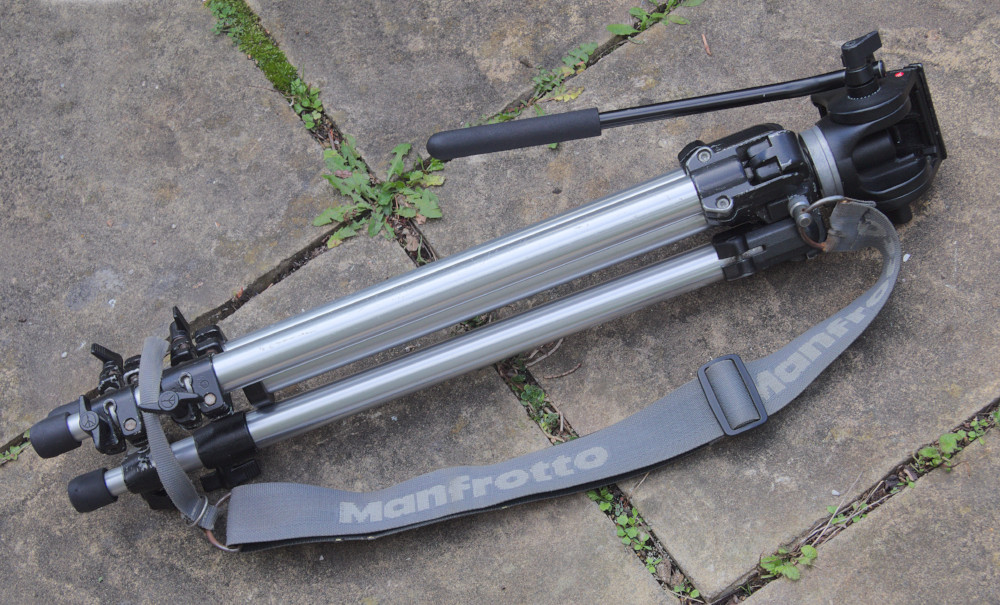
I have an aluminium Manfrotto tripod I inherited it from my father-in-law who died in 1999, so it must be getting on for 20 years old. I have changed the head on it for a more recent fluid video head (701RC2), but otherwise it still does a good job both for my bird watching telescope and for photography. The head takes a quick release plate (200PL) so it is easy to switch between the telescope and a camera.

The tripod is quite heavy (3.1kg including the head) so carrying it has always been a bit of an issue. A long time ago, I bought a carrying strap from the Manfrotto stall at the Bird Fair. I think it is part number MN3044 - described as a "heavy duty, long carrying strap", but it is no longer available and superceded by at least a couple of generations of newer designs. This strap has a screw fitting at one end, which goes into a threaded hole where the legs join, and a D-ring at the other end which allows you to make a loop which fits over the bottom of the folded legs.

Tripod with strap attached


This works very well for carrying just the tripod, but with the telescope mounted, it will not stay upright and the only way it works is to have the tripod in the downwards direction with the 'scope at the bottom. I have carried it like this for many birding trips and it is OK, but it is not ideal. The main problem is that, in this position, it does not stay on my shoulder and I am for ever hitching it back into place. The strap did originally have a rubber pad on it, presumably to help it stay in place. But I found it too flexible and it tended to bunch up uncomfortably - so I took it off (and have subsequently lost it!).
The tripod alone (left) can readily be carried more or less upright, but with the telescope mounted, it won't stay in place when upright and is most easily carried with the 'scope hanging downwards (right).
As I reported in my last post, up until last year, I carried quite a bit of photographic gear in a rucksack style camera bag. I decided that this wasn't working well because of the time it took to get stuff out - which often led to missed opportunities. This year I have been carrying the camera with the Canon 100-400mm lens mounted and ready to go - carried on a shoulder sling. So, rather than carry a rucksack photo bag, I decided I would try a rucksack-style tripod carrier.

After some research online and checking out forum posts, reviews, etc., I decided on the Mulepack from Cley Spy. I particularly liked this design because it acts both as a small conventional rucksack as well as a tripod carrier and the reviews suggested it was comfortable and durable.
Attaching the Mulepack to the tripod: There are two straps which go around the centre column either side of the block where the legs join and two large, broad Velcro straps which go round the legs. Finally, there are a couple of straps that go around the base of the first leg extension and fit into quick-release buckles at the bottom corners of the Mulepack.
In use, the tripod attached to the Mulepack, can be carried like a rucksack and the broad padded straps make it comfortable, even for quite long treks.
The large triangular section to which the legs attach makes a bag which can be accessed via a diagonal zip. I find that my waterproofs, folded flat, fit very conveniently in here.
The large, flat carrying area, accessed via a diagonal zip on the back.
There is another pair of smaller containers (shown on the photos above) which are detachable via a couple of buckles and Velcro. I find these useful for carrying small accessories like a spare camera battery, 1.4x extender and extension tubes. All up, the Mulepack, my waterproofs and with these accessories in the pockets, weigh in at 1.4Kg. Add the 3.1Kg of the tripod and 2Kg of telescope for a total of 6.5Kg - which is a lot less than my photo-gear rucksack weighs!

To use the tripod, you just take it off your back and extend the legs as necessary. It is used with the Mulepack in place and this does not interfere with extending the legs or centre column at all. You can even take the centre column out (e.g. to use in a hide clamp) without disturbing the Mulepack. The centre column simply slips out of the loops made by the two straps. When putting it back, you just have to be careful to get it back through these two loops. It is also quite feasble to carry the tripod with the legs extended at least by one step. It is even possible to carry it fully extended, but I find that the legs do tend to hit the ground, so it is only good for short distances.
Tripod in use, fully extended with the Mulepack attached.
One problem Cley Spey warn of is that the main triangular section of the Mulepack can act like a sail and catch the wind - increasing the chance that the tripod will fall over in a strong gust. This is the purpose of the quick release buckles at the bottom corners. These can be undone allowing the triangular section to flap freely in the wind and lessen the sail effect. The other drawback I have found is that, if gear like my waterproofs, is stored in this triangular section then the tripod legs won't fold very close together. This makes it a bit more bulky, to go in the boot of the car for example, and when fully extended, makes it a bit less convenient to carry over your shoulder.
Current field gear - camera on shoulder sling and telescope on the tripod carried rucksack-style  in the Mulepack.