I have read many postings and articles on this subject which suggest many ways of setting up the camera and the techniques which go with them, and I have tried out several of them. So here are my experiences.
Problem 1: Using the LCD viewfinder in daylight.
The only way you have to view what the camera is "seeing" through the 'scope, so that you can frame and focus the image, is the LCD display. At least the Nikon Coolpix twisting body design allow you to position the LCD at a convenient viewing angle. But outdoors, in bright daylight, it is often very difficult to see anything in the LCD!
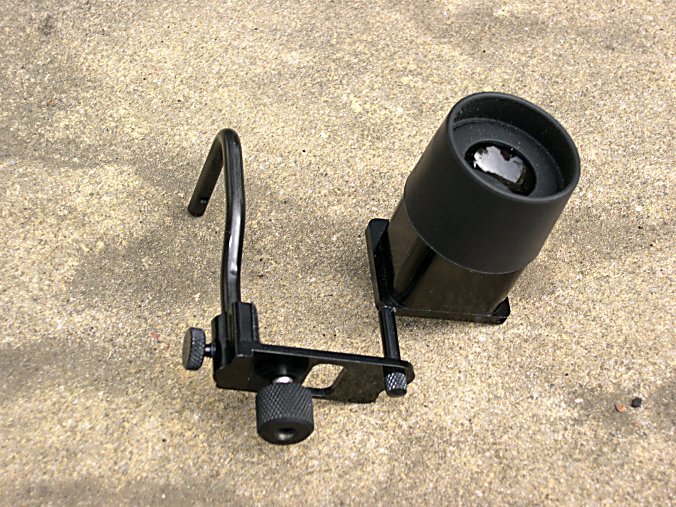
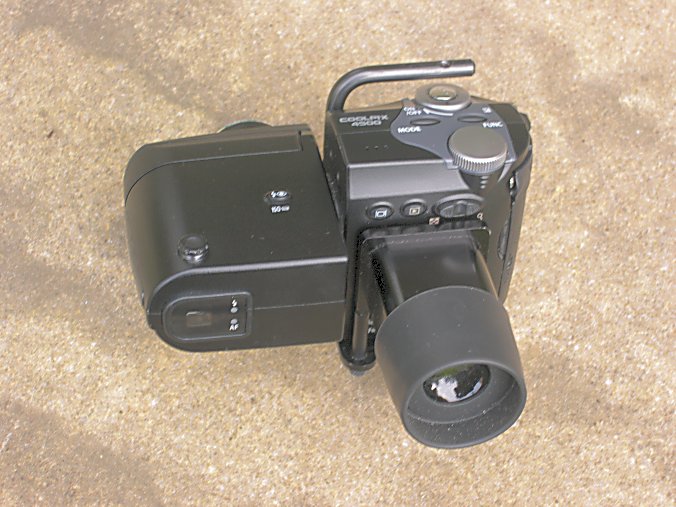
The solution to this is an LCD shade. I use the
Eagle Eye Xtend-a-view shade which has a built in 2x magnifier which also helps with focussing. This mounts on a plate which screws into the tripod mounting thread on the camera-base and also provides a mounting point at the front for a cable-release arm.
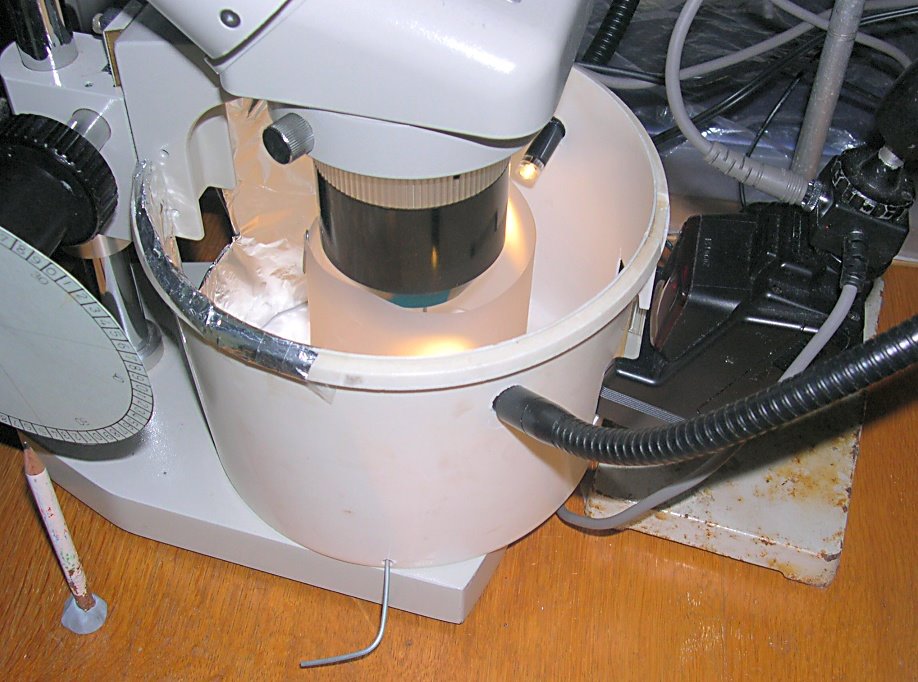
I bought this gadget well before I tried digiscoping. I use it with the Coolpix mounted on my binocular microscope. It does its job very well: as an LCD shade, a magnifier to aid focussing, and in mounting a mechanical cable release to help avoid camera shake problems when you take a shot. The one criticism I have is the way the shade is mounted on the bracket. There is a little knurled knob which screws into the bottom of the arm on which the shade is mounted. It is always working loose, allowing the shade to swing away from the camera-back. This can get quite annoying at times.
Problem 2: Focussing modes
The first thing to say is that the camera's default mode is "Continuous autofocus". This is a disaster when using the camera mounted on a telescope or microscope - turn it off!
The camera's autofocus system works by choosing some point near the centre of the field of view and maximises its contrast by driving the focus mechanism backwars and forewards using a servo-motor. You hear the motor whir and see the focus change in the viewfinder. The problem, when it is mounted on a 'scope, is that you try and focus the image in the viewfinder using the 'scopes focussing knob. The camera picks some contrasty object in the field of view and refocusses the camera. You react by refocussing how you want it using the 'scope focus knob - and so on. This fight can go on forever without achieving a focus position that both you and the camera agree on and flattens the battery very quickly into the bargain!
There are two main approaches:
- Turn off the camera's auto-focus and use the 'scopes focussing mechanism alone,
- Use "single-shot autofocus" so that you tell the camera when to auto-focus.
Manual focus
On the Nokon Coolpix 4500, you engage manual focus by going to "P", "S", "A", or "M" modes (i.e. NOT the default "Auto" mode), press the "MF" button (the left-hand most button below the LCD panel) and rotate the command dial until the manual-focus display shows. This appears as a yellow bar with a tulip icon to the left (signifying close-up) and a mountain icon to the right (signifying far-off). If you rotate the command dial until the bar is all the way to the right - towards the mountain icon - then the camera is focussed at infinity.
With the camera set like this, you can now use the 'scope focus knob and the camera will not attempt to change the focus - its entirely up to you to judge when your target is in focus according to what you can see on the LCD viewfinder. The 2x magnified view provided by the EagleEye comes in handy at this point.
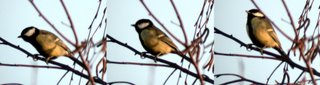
The problem I have found with this is that it is very difficult to get a picture with the subject sharply focussed. The three shots of a Great-tit singing in my garden were taken like this. They are three conscutive frames from a longer squence taken one after another whilst trying to focus manually. None of them came out really sharp.
With the camera mounted on a telescope, the depth of field is extremely small. Even if you have enough light to stop the camera down, you still won't get much depth of field. Consequently, focus is extremely critical - you don't have any marginn for error. The view you get via the LCD screen just isn't really good enough (it doesn't have enough pixels) to allow you to judge exactly what is in focus.
Consequently, I find manual focussing too hit and miss.
Single-shot auto-focus.
On the Coolpix 4500, you get to the auto-focus options from the "Shooting menu". In "P", "S", "A" or "M" modes, press the "Menu" button below the LCD panel and the Shooting menu is displayed. Scroll down to "Focus Option" (on the third screen down), choose "Auto-Focus Mode" (second option), and then "Single AF" (bottom option).
With this setting, half-pressure on the shutter release button causes the camera to auto-focus. It shows you, in the viewfinder, the region of the image on which it has chosen to focus by displaying a pair of red square-brackets.

In this example, it has chosen the end of the bird's wing - which is fine.
There is a lot of debate about what other settings to use with this. As you can see from the viewfinder-shot above - I have Macro-mode enabled (the yellow tulip icon near the top-left corner). The theory is that the camera is actually focussing on the image formed by the 'scope - which is very close - so Macro-mode is an advantage. I certainly find it seems to work best with "Macro" switched on.
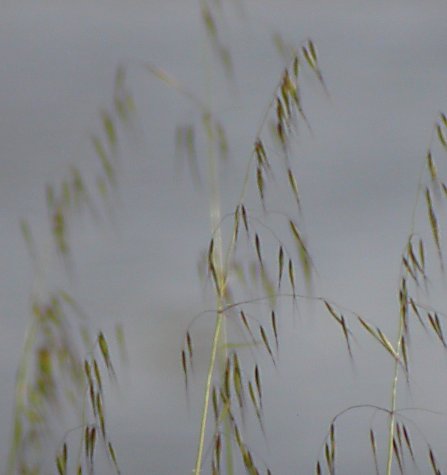
The problem is that you have no control over the exact spot on the image at which the camera chooses to focus. The following consecutive shots of a Marsh Sandpiper show an extreme example:
The bird was on a pool which I was viewing over a bank which had sparse, tall grass growing on it. The bird was near the front of the pool, so I was viewing it through the grass. In the left-hand image, the camera's auto-focus picked the stony point and the bird is pretty much in focus. The very out-of-focus green splodges are the grass heads in the fore-ground. In the next shot, the auto-focus has chosen to focus on the grass heads and you may just be able to make out the brown haze where the bird is in the background!
Her is a more typical example:

The bird (an Isabelline Wheatear) is sitting on a rock with another rock behind it. The auto-focus has chosen the rock behind to focus on, so the bird is well out of focus - although the background rock is nice and sharp.
All you can do, I find, is half-cock the shutter, see where the auto-focus has chosen and decide whether to take or not. If it doesn't look appropriate, take the pressur off the shutter button and repeat. Depending on the nature of the image, it will rarely pick the same bit of the image to focus on twice, and it tends to pick somewhere near the centre of the image. So, if your target is centred and appears to be well-focussed through the 'scope, it will, hopefully be chosen - eventually.
The auto-focus system tends to choose highly contrasty subjects and especially likes strong horizontal or vertical lines. This makes shots in reedbeds particularly tricky! These present a great arrayof strong vertical lines (the reed stems) so exactly where it will choose to focus is very chancey.
There is one more mode that I haven't tried out. Another option under the "Shooting menu - Focus Options" is the "AF Area Mode". In the above discussion, I had left this on "Auto" - i.e. the camera choose where to focus based on maximising contrast near the centre of the image. You can set this to "Manual". You then get an array of 5 rectangles (at the centre or just above or below, or to right or left of centre). You choose which of these 5 areas will be used via the little joystick button.
I don't think it would be feasible to change the selected area whilst you were in the middle of taking a shot. Trying to manipulate the joystick button would inevitable disturnb the camera's postioning and you would probably lose the target! But it should be possible to pre-set the autofocus area and then frame the shot so your taget is postioned over the selected focus-region. I will give this a try sometime and report back.